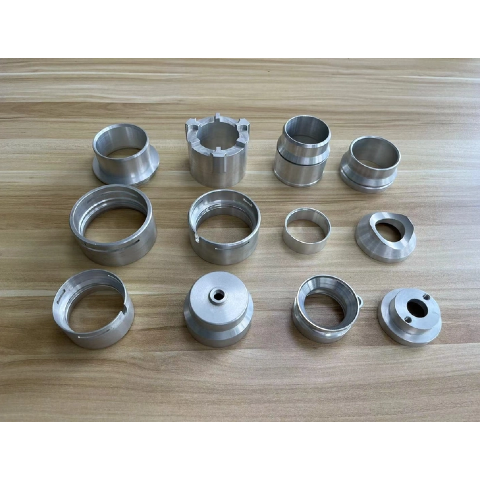
In advanced manufacturing, the ability to detect and prevent defects directly determines product quality and customer trust. At Ningbo Joyo Metal Products Co., Ltd., we understand that defect control is no longer about isolated fixes but about creating a continuous system that spans surface and internal inspection, process monitoring, and digital traceability. An integrated strategy allows manufacturers to inspect early, diagnose fast, and feed knowledge back into the production line, lowering scrap rates and accelerating time-to-market.
Why an integrated approach is better than isolated fixes
Traditional methods of addressing defects often rely on end-of-line inspections. A product is made, checked once, and either accepted or rejected. This reactive approach has several weaknesses. First, surface checks alone may miss hidden flaws inside the component. Second, relying on a single inspection step provides limited visibility into where problems originate, making root-cause analysis difficult. Third, when issues are only detected after production, valuable time and resources are already lost.
By contrast, an integrated defect control system combines multiple inspection and monitoring techniques across the entire manufacturing process. From raw material verification to in-process monitoring and final validation, each step contributes to a complete quality picture. Manufacturers benefit from traceability, meaning every defect can be linked back to its cause, enabling corrective actions at the source. This approach reduces escapes—defects reaching the customer—and improves overall process stability. For global suppliers like Ningbo Joyo Metal, it also builds confidence with partners who expect reliable, defect-free components across industries such as motorsport, mining, and precision fixtures.
Surface inspection technologies and inline monitoring
The first line of defense in defect control is the surface itself. Many issues, such as scratches, cracks, pits, or uneven coatings, originate on the outer layer and can be detected with optical tools. Inline optical inspection systems use high-resolution cameras and laser profilometers to capture surface geometry in real time. These systems measure roughness, flatness, and dimensional accuracy without halting production.
Beyond visual checks, automated surface scanning paired with run-time statistical process control (SPC) ensures that trends are detected before defects accumulate. For example, if a slight drift in machining accuracy begins to appear, SPC charts highlight the deviation early, preventing out-of-tolerance parts. Profilometry, whether contact-based or optical, provides quantitative data on surface finish, which is critical in industries where smoothness impacts performance, such as exhaust systems and hydraulic fittings.
By embedding these tools directly into production lines, manufacturers achieve continuous monitoring rather than occasional sampling. This inline layer of inspection creates the foundation for a wider integrated defect control framework.

Internal inspection and NDT
While surfaces reveal many flaws, the most critical failures often occur beneath the visible layer. Internal voids, inclusions, porosity, or cracks can remain hidden until a part is under stress in the field. To address these challenges, non-destructive testing (NDT) technologies form the backbone of modern defect control.
X-ray radiography and computed tomography (CT) scanning allow manufacturers to visualize internal structures without cutting parts open. CT scans provide three-dimensional reconstructions, making it possible to measure wall thickness, identify shrinkage cavities, and assess assembly fit. For high-value or safety-critical components, such as those in motorsport or mining equipment, CT inspection is a valuable tool.
Ultrasound is another widely used method, especially for welds, forgings, and thick sections. By transmitting high-frequency sound waves into a component, it reveals internal discontinuities through echoes. Eddy current testing, on the other hand, is effective for detecting surface-breaking cracks and near-surface flaws in conductive materials.
Manufacturers must balance cost and efficiency when selecting methods. CT scanning, while powerful, may be applied on a sampling basis due to time and cost, whereas ultrasonic inspection can be adapted for inline applications. Integrating both surface and internal inspection ensures that no class of defect escapes detection.
Process monitoring and AI for early defect prediction
Inspection alone, however, is not enough. True integration means preventing defects before they occur. This is where process monitoring and artificial intelligence enter the picture. By equipping machines with sensors that capture melt temperature, pressure, flow rate, vibration, or tool wear, manufacturers build a detailed data stream reflecting the health of the process.
Machine learning algorithms can analyze this data to identify anomalies that correlate with future defects. For example, a subtle change in pressure curves during metal casting may predict porosity formation, while unusual vibration patterns in machining could indicate tool degradation. Early detection allows corrective action before defective parts are produced, shifting quality control from reactive to proactive.
Closed-loop control takes this further by feeding AI insights directly back into machines, automatically adjusting parameters in real time. This transforms defect control from a manual inspection activity into a continuous, intelligent safeguard embedded in production.
Digital tools and workflows
Inspection data alone has limited value unless it is structured and traceable. Digital twins, traceability systems, and supplier dashboards now play an essential role in integrated defect control. A digital twin is a virtual replica of the manufacturing process, updated in real time with sensor and inspection data. It allows engineers to simulate changes, forecast outcomes, and test scenarios without interrupting production.
Traceability solutions assign unique identifiers (QR codes or serial numbers) to each part, linking inspection results, process parameters, and supplier information into a digital record. This record follows the part through the supply chain, enabling both customers and field service teams to access its history if an issue arises. For a global exporter like Ningbo Joyo Metal, this transparency demonstrates accountability and builds stronger customer relationships.
Supplier dashboards extend the same visibility to external stakeholders. Customers can view real-time defect rates, inspection results, and corrective actions, fostering collaboration rather than disputes. Together, these digital workflows create a connected ecosystem where defect control is no longer a silo but a shared responsibility across the value chain.
Implementation roadmap and ROI
Adopting an integrated defect control system requires careful planning. A phased roadmap minimizes risk and ensures measurable results. The journey often begins with a pilot on one product line. Here, selected inspection technologies—such as optical surface scanning or ultrasonic testing—are introduced alongside process monitoring sensors. Key performance indicators (KPIs) such as scrap rate reduction, process capability (Cpk) improvement, and cycle time are tracked to evaluate impact.
Once validated, the system can be scaled across additional lines and product families. The second phase often includes the addition of machine learning models, enabling predictive analytics. In the final phase, full digital twin integration and traceability systems close the loop, connecting suppliers, manufacturers, and customers into a single quality network.
The return on investment is typically realized through reduced scrap, fewer customer complaints, less rework, and faster time-to-market. For many manufacturers, the competitive advantage of delivering consistently defect-free parts outweighs the cost of implementation.
Conclusion
Defect control has evolved from a single inspection step into an integrated strategy that unites surface monitoring, internal NDT, process sensors, AI, and digital workflows. At Ningbo Joyo Metal Products Co., Ltd., we embrace this approach to serve industries where reliability is non-negotiable. By combining advanced inspection with proactive process control and traceability, we help customers achieve higher quality and lower risk. To explore how our integrated inspection and qualification packages can strengthen your supply chain, contact us today.
English
العربية
Français
Русский
Español
Português
Deutsch
italiano
日本語
한국어
Nederlands
Tiếng Việt
ไทย
Polski
Türkçe
አማርኛ
ພາສາລາວ
ភាសាខ្មែរ
Bahasa Melayu
ဗမာစာ
தமிழ்
Filipino
Bahasa Indonesia
magyar
Română
Čeština
Монгол
қазақ
Српски
हिन्दी
فارسی
Kiswahili
Slovenčina
Slovenščina
Norsk
Svenska
українська
Ελληνικά
Suomi
עברית
Dansk
Afrikaans
Gaeilge
Eesti keel
latviešu
Беларуская мова
Български
Català
Lietuvių
Lëtzebuergesch
Македонски


